DIY Dividers
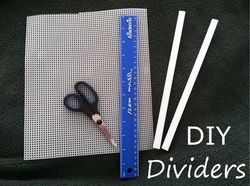
Bettas can't live together directly, but typically do just fine in a divided tank of appropriate size. This guide shows you how to make cheap and effective DIY dividers for a fraction of the cost of pre-made ones, which are often too clear in the center and cause bettas to become angry and stressed at their neighbor's grumpy mug.
Please heed the warnings at the bottom of this guide to ensure your fishs' safety. Despite our hard work and meticulous testing, not all dividers are 100% unpassable!
Please heed the warnings at the bottom of this guide to ensure your fishs' safety. Despite our hard work and meticulous testing, not all dividers are 100% unpassable!
Noteable Notes:
Firstly, no tank under 5 gallons should ever be divided. It is CRUEL, INHUMANE, and NEEDLESS. This guide does not support dividing tanks under 5 gallons and hopes that you do not use this information to do so, as it is mistreatment.
Dividers are cool, but not for every tank.
- If your tank is under 5 gallons, it should not be divided. Even if you want it to be, it’s not ok! Don’t do it. Things get really bad really fast in under 5 gallons with more than one betta. Even though each fish would "get" xx number of gallons of space in under 5 gallons, that means the space is really tight, and the poor fish can't get away from each other. This is stressful and needless.
But I’ve seen divided 2.5 gallon tanks! 1.25g each!
-That means literally nothing. There are lots of cruel, unethical things out there for sale and that people do. It doesn't make it right.
My tank has a considerable bow front. Is it ok to divide?
- Some tanks are. It gets tricky the more intense the bow. Tanks expressly labeled ”bow front” are often not great for dividing since they’re easy to slip around. Tanks with gentle bows like the Petco 6.6 Bookshelf tank are okay, however.
How many times can I divide a tank?
- Depends on the size. 5g only one divider, 10g one to two dividers max, and so on. Be careful- each fish may get “2+ gallons” when a 10 gallon is divided up, but a skinny little slat of space is not an appropriate home. Don’t over divide your tanks, that’s not fair to the fish. Don’t hoard them just because you can!
...Anyways, here’s how to do it!
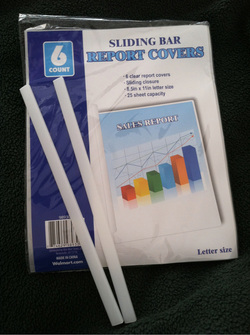
You’re gonna need a few things before making these badboys. To make the dividers, you will need:
- at least 2+ sheets of needlepoint/craft mesh. It is sold in craft stores and even Walmart. It comes in lots of colors and is frequently around 50 cents a small sheet. Darker colors are harder to see through.
- spines for the dividers, which are made from “binder spines” from report covers. These are sold with the spines (plastic) and clear sheets that are used for over a report. They’re sold at a lot of places including office supply stores and Walmarts. It doesn’t matter the color or brand. They’re often in packs of 4-6 and run around $2.
- Ruler
- Scissors
- Maybe an exacto knife, if you'd like
- pencil
- Measure your tank's width, length, and height. Record it.
- Do it again, two or three more times. It's super important to have good measurements.
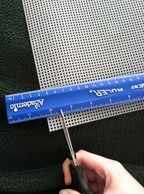
3. Measure the width of your tank against your mesh, and make a gentle mark where you want to cut. Please don’t use marker, etc on the mesh. That’s not something you want in your tank! A small nick out of the area does a great job of reminding you where you need to go.
|
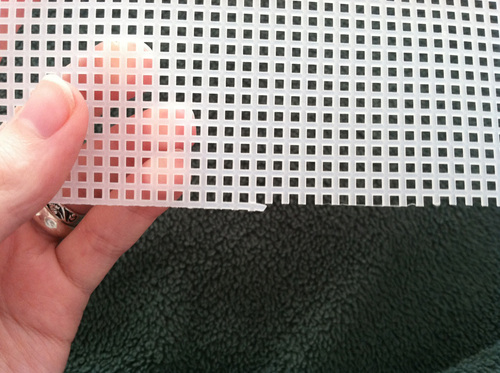
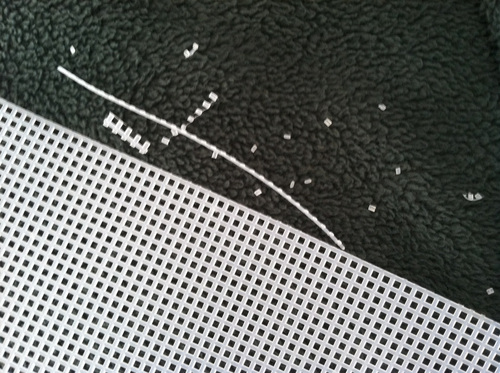
4. Try to cut evenly and avoid the sharp edges. If you have any rough sides, make it all the same if you can.Cutting rough edges makes little plastic bits come off. Please be sure to get all of these off! They come off in water and float, which makes a tempting treat for fish. Don’t let them eat them- at best it will make them really bound up and at worst… Let’s just make sure it doesn’t happen.
|
5. Repeat this process again for the height of the tank. You will probably have to cut more later to adjust for the spines, so don't kill yourself over step 4.
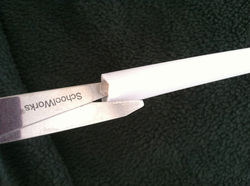
6. Now you need to modify your binder spines, which are what hug the glass and keep the mesh secure. They need to be cut so they fit super snug under the lip of your tank. If they don’t, that could spell issues. You will want to measure many times. This is often trial and error, and that's okay.
They’re hard to cut, so be careful. A good idea is to go into them with scissors and cut along the "side/flap" to help weaken the area you don’t need. It is hardest to cut the back/flat part. Cut along the side, then cross to the back, then the other side to avoid desperately cutting through, which won't really work.
They’re hard to cut, so be careful. A good idea is to go into them with scissors and cut along the "side/flap" to help weaken the area you don’t need. It is hardest to cut the back/flat part. Cut along the side, then cross to the back, then the other side to avoid desperately cutting through, which won't really work.
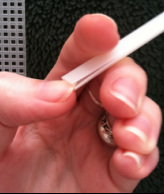
7. Once cut, pry open the spine a little at the end with your nail. Some are very tightly shut, which will make the next steps way harder than needed (re: annoying!). Open it a bit to make it slightly less a pain in the rear.
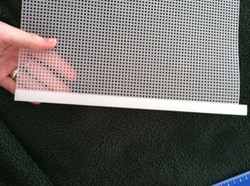 Yours should look more even than this
8. Then, slide the spine over the side of the divider. It may not glide over well at first because it’s new.
*Looks good! Mine has a lot extra on the top because I’m just using whatever I had laying around. I also have no need to make a divider, so I wasn’t cutting or anything. HOWEVER, your mesh should be just as tall as the dividers, give or take a few cm!!!!
If you leave too much space between where the spines meet the lip of the tank and where the mesh is, fish can jump over! :(!!!
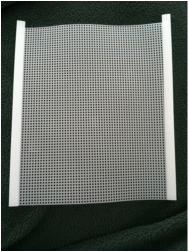 Again, yours should be more even than this
9. Add the other spine. You can add spines at the top and bottom for added support, too. It should look like this when you’re done. Not super fancy, but it’s cheap and works!!
*Using two sheets rather than one makes it even harder to see through.The benefits of two sheets in darker colors is that the fish won’t see each other as well and be pissy less. However, they WILL still see each other and WILL still get pissy for up to a few weeks.
*Using two sheets rather than one makes it even harder to see through.The benefits of two sheets in darker colors is that the fish won’t see each other as well and be pissy less. However, they WILL still see each other and WILL still get pissy for up to a few weeks.
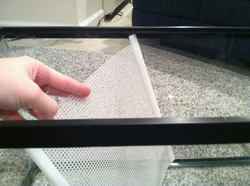 Bring it at an angle to keep it snug
10. It's fittin' time! Bring that bad boy over to the tank to get it fitted and make needed changes!
Sometimes the dividers are too tall or too snug under the lip to go in straight down, so turn your divider to bring it in the tank and on a slant, bring it up under the lid snugly.
*If your divider doesn’t fit even sort of snug under the lip, do it again!!! The snugness is what makes it safe! If not snug, why bother using the spines??? Redo it!
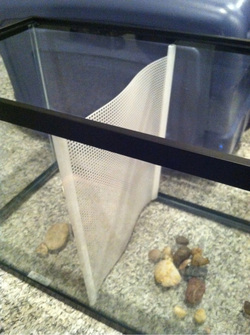 Don't use rocks or this little material, this is an example
11. Once you've fitted (and possibly modified) your divider, and know it fits snugly at all sides, push your gravel up to the sides of the tank, away from the divider. Your divider should be snug enough against the glass and under the lip to stand up. If not, redo or pull the spines slightly out from your mesh (only slightly) to snuggify them.
*I did not have gravel to demonstrate with; I used rocks to show how you'd push you gravel away from the divider here. Don't use rocks like these as its not safe. Don't use this little of material, either!! Marbles, rocks, and gems are not safe enough.
*I did not have gravel to demonstrate with; I used rocks to show how you'd push you gravel away from the divider here. Don't use rocks like these as its not safe. Don't use this little of material, either!! Marbles, rocks, and gems are not safe enough.
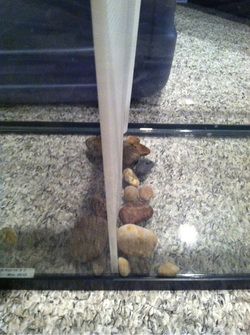 An example, please don't use rocks or so little material
12. Push your gravel against the sides of the divider gently. Pay close attention to the ends of the divider; they’re the weakest spot and need the most attention! Pushing the gravel against the divider to stabilize makes the divider stronger and less wobbly. In combo with being snug on the sides as well as under the lip, it makes it hard to get knocked out of place AND hard to wiggle around!
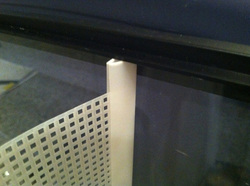
13. Make sure the divider is still snug under the lip! This is A HUGE DEAL! It’s what makes your dividers so strong! Only-mesh dividers are weak in that they can be pushed over or skiddered past by a fish. This prevents just that!!
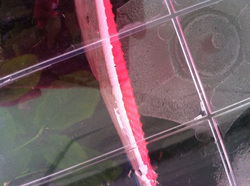 Ex. of mesh bowing from lid being put on: dangerous!
14. Put on your lid, splash guard, etc. and see how it rests on the tank. Make sure nothing bows, buckles, or gets knocked out of place! Adjust accordingly, cut when needed.
Things to remember:
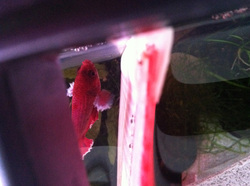
- Make sure you don’t leave your feeding flap open.
It happens to me! Just keep it closed and it’ll help.
- Since a jump can land one fish from his side to the other’s, HIGHLY discourage and scold jumping behaviors!! If a fish jumps for his food (he shouldn’t be trained to, this is a rather dumb thing to teach!!), a hard tap against the tank right in front of him right away (don’t wait or he won’t associate it with the behavior) will teach “No! Don’t do that!”If the fish jumps in excitement, don’t feed it for a few more minutes. If you give it the food, that means “Good! Yes I want you to jump!” and you don't!!
- Use decorations around the dividers as a way to help block both fish from seeing each other. Tall, fluffy plants that line the divider is a good idea. Use a number of tall, fat, wide, fluffy, medium and short plants to make the fish’s tank buddy harder to see through it.
- Make sure both fish have a spot they can legit hide in as far from the divider as possible. A cave is a great option.
- Consider the amount of space each fish gets while dividing. Your long, heavy-tailed male will need less space to move around in than your zippy, active short finned one. It’s fair! They don’t care, the only one who does is you and that’s silly. Even-stevens doesn’t apply to fish.
If one fish has the filter on it’s side , give it more space. It has to contend with filter current and avoid the intake, so it needs more space.
- If you have a female-male divided tank, give your female more space. She needs it to hide if he freaks her out or won’t leave her alone. It is not recommended to have a female and male in a 5g split, but is do able. Make sure they BOTH have lots of spaces to hide.
Warnings and considerations:
- During the first few days, Watch the tank! If you’re leaving for a few days, that is NOT a good time to set up a newly divided tank!
- Don't fret over flaring and crabbiness. It’s ok. They’ll chill out in a few weeks.
- Divided tanks need MUCH more frequent water changes until they are cycled.
- Be careful with illness. At first inkling of a sick fish, remove the ill one and change a lot of the water for the other. Do not treat both at once unless obviously needed- that’s like your brother getting a headache and everyone in the house has to take aspirin.
- DO NOT PUT BOTH FISH IN RIGHT AWAY!!! Dont. Don’t do it. You don’t know for sure if one can get around the divider. Instead, let one into the tank on its side and keep the other in a cup to float a few days. This way, you can see if the fish a) can find a weak spot in the divider and get past, and b) if it DOES get around the divider, no one gets hurt since one is in a cup!!!
- Be ready for the worst. Its not uncommon for jump-overs, sneak-arounds, and fights. Have a cup and net near your tank to scoop up one fish and get them away from the other if anything happens. If it seems like something’s not gonna go well, don’t leave it to chance. Cup one fish to protect both if you think someone will get around the divider, like above.
- You can use sealant to seal your divider spines to the tank. I do not recommend. It always looks crappy and doesn’t overly lend to the tank being safe. You must leave 2 or so days for the sealant to cure, too, which is a pain. Just make them snug.
- A tooth brush that’s never been used helps for keeping dividers clean- gently scrub to remove algae!
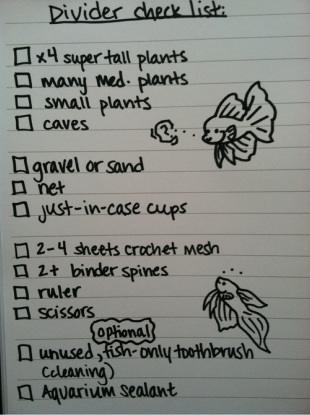
Here's a little checklist for keeping track of thing you'll need! Best luck!
